 | When I made these cookies I was a bit 'in a hurry and did all the photos of the procedure, but they are simple so do not need a super-detailed description! ;) At first I thought of making glass cookies, but I had no trouble crushing the candy and then I did not like so much the flavor of the biscuit together with that "fake" fruit candy, so I've made a few just for decoration, because in fact they are beautiful! And then I gave them all to something more gourmet biscuits covered with white chocolate and coconut! Mmmm yummy! |
For biscuits glass I followed indications of this blog .
GLASS COOKIES
PREP TIME: about 2 hours (including the sides of the pastry).
INGREDIENTS:
pastry: my recipe here, in this case instead of the lemon peel I put the orange peel , has come very good!
hard candies and colored a lot ', I can not quantify, but since it takes a lot of ground.
PROCEEDINGS Chop the candy
° intermittently creating small crystals. This is the crucial step that I failed, I got candy powder and then melted in the oven was too soon and in time they are baked cookies (5 minutes) has started to boil the caramel and it came wrong ... so I redid all the sweets made with a hammer in a towel ... an infinite not advise you to do, because even then I was all stuck to the canvas! In addition, I warn you that I was a bit 'spoiled the food processor because the candy stripes have slammed all plastic .... In short, these cookies are beautiful, but I do not think I'll just make them! (
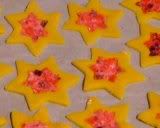
° After the rested pastry, roll it thin enough and make the shapes of the cookies, filling the hole with a nice little 'crystal candy.
If you want, do a small hole at the top and then put the wire for hanging.
° Bake in preheated oven at 180 degrees for 5 minutes, or just the edges of cookies begin to color.


° A once baked, not move the cookies from the baking sheet until they are completely cooled, otherwise the caramel will ruin!
° Here they are ready:
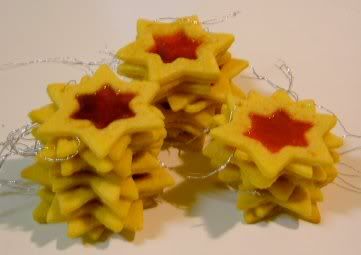
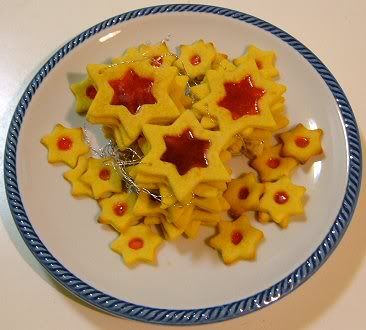
° are good, but the taste is strange because there is the taste "hot" cookie and a "fake" candy ... In short, beautiful, but not very good (at least for me, my mom and my sister liked them)

The snow-covered trees are even more simple and are very good !
ALBERELLI SNOW
PREP TIME: from 2 to 4 hours, depending on how melt the chocolate (including the sides of the pastry).
INGREDIENTS:

· to make the pastry, let it rest, then roll it out and make cookies with cookie-cutter Christmas tree, bake in a preheated oven at 180 degrees for 5 minutes, or however when the spikes will start to caolorare.
° To melt the chocolate before it breaks into small pieces, then you can follow two routes:
- the easiest way but not "professional" and that melt in microwave or over hot water without taking the temperature of the chocolate. It works, but takes longer to solidify on the biscuit.
- Or via the "professional" and that is: put the thermometer in the saucepan, melt the chocolate in a double boiler over medium heat (not boil) until the chocolate reaches 45 degrees, turn off the heat, pour most of the chocolate in a bowl and place the pan under water. Stir the chocolate plate to cool faster, until it reaches the 26-27 °, at this point add a few spoonfuls of the hot in order to raise the temperature to 28 °. It 's all explained perfectly in this discussion , look especially "Measuring the temperature" and "temperature" ...

° A once melted chocolate as favorite sull'alberello spread it and sprinkle with desiccated coconut before it cools.


