San Martino  | Venice is used to celebrate San Martino, weather, the children went around beating on pots and tin cans and singing nursery rhymes ( here to learn more) Recalling altruism of San Martino to get some money or some candy ... I think it still is not now, I'm not sure ... But the custom has been to the dessert of San Martino, which would be a short pastry biscuits decorated with colored icing, chocolates and candy ... The shape of the cookie
recalls the legend of St. Martin , then there is San Martin on horseback, his hat with feathers, the cloak and sword ...
You can find some examples here , here, here and here
For the series "Amarcord" ...
When I was little my mother organized a meeting at our house, invited my classmates and the kitchen became a laboratory!
There were so many bowls and in each there was a type of chocolate or candy, so many decorations such as tails, the balls silver (typically used by the bridle of the horse: P) and icing sugar!
Before each drawing its San Martin on horseback (some masterpieces!: P), then cut out and used it to shape the pastry ... Once cooked decorate it as desired. Each had its own St. Martin's personal! Beautiful!
I did it last for ever and we stayed bad because all the decorations ended better soon! But then my mother pulled out something that was left out, so I might as well have fun! : Rolleyes!:
Well ... after all this introduction we pass to the recipe! |
SAN MARTINO PREP TIME: ° about an hour and a half for the crust (including rest and cooking).
° Recharge time variable for cooling and decorating ....
INGREDIENTS For the pastry:  Farina: 200g Butter 100g Sugar: 70g Eggs: 1 egg or 2 egg small Lemon: possibly because it serves a biological
 the skin.
INGREDIENTS FOR DECORATING:  Chocolate dark: Approximately 100g Powdered sugar: about half
 envelope.
Smarties, preferably different colored chocolates decorate as desired such as imps, and silver-colored balls, meringues, macaroons .... so on and so forth! PROCEEDINGS 

· Join the flour, sugar and lemon zest.

° With your hands make small knobs of butter and spread on flour.


° Add the egg and mix with the spoon until the flour has absorbed the good.


° At this point, mix with finger tips trying to mix the butter with the rest until you get a cake fairly homogeneous, it is important not to mix so much!
° Cover the pastry and allow to rest for about 30 min in coolbox.

° If you want you can draw the shape on a piece of San Martino.
I usually drawing the outline with a knife lying directly on the pastry, I start with a horizontal rectangle and a vertical for the horse to man, then all parties cut the sticks under the feet of the horse to do the land ... But
tease me (rightly!) For the shape of my horse ... say it is a dog-cow! But (apart from that I'm not a big draw) my logic is: the more the horse is fat, no more cookie to eat! And the end there are fewer parts there is less risk that the cookie break! : P Here
those of previous years:
2005_a ,
2005_b ,
2006_a ,
this instead did my mom and is a San Martino and is giving the mantle ...
However, this time to do things the right way my mother drew the outline of this year so anything horse-dog-cow! : P
• Only start the oven 180 °.

° Removed the dough from the refrigerator roll out evenly so that there is the shape of San Martino.


· Place the stencil and cut the pastry, then cut the excess and stick under the feet of the horse to do the land ...
Carry the pastry on the baking sheet and bake for about 10 min.

° pastry seems harsh, but really just needs to cool to harden, so before moving it from the pan to wait for it to cool, seen in the St. Martin has many fragile parts is better to help with a carrier for move it!


° At this point, the way the decorations! To make the frosting
sprinkle a few drops of water icing sugar and beat well with a fork. Some people use lemon juice, some milk ... The important thing is to put a little liquid! You can paint with a little 'food coloring ...
The chocolate can melt in microwave (30 seconds at maximum temperature, mixing for 30 more seconds, and mix well ... until it is dissolved).


° If you want to do a thing of precision can be done with a cone la carta forno e la pinzatrice riempirlo con il cucchiaino (non troppo pieno!) e segnare i contorni con la glassa più densa e poi riempirli con la glassa un po' più liquida aiutandosi col cucchiaino (come spiegato
qui ).

° Aggiungere le decorazioni come le palline e le codette prima che la glassa si solidifichi, i cioccolatini più grandi invece si possono aggiungere dopo "incollandoli" con un po' di glassa bianca.
° Per il cavallo ho usato 2 o 3 quadrotti del cioccoblocco.
Per l'uomo è bastata la glassa della prima tazza e per il mantello quella pochissima glassa rossa, per il prato invece ho fatto "due tazzine di glassa".
Poi ho fatto some more 'of white frosting for the decorations end.
°
NB always carry the card below!
RESULT:


 Candy Cane Cookies


 , but I re-customize it to fit the header.
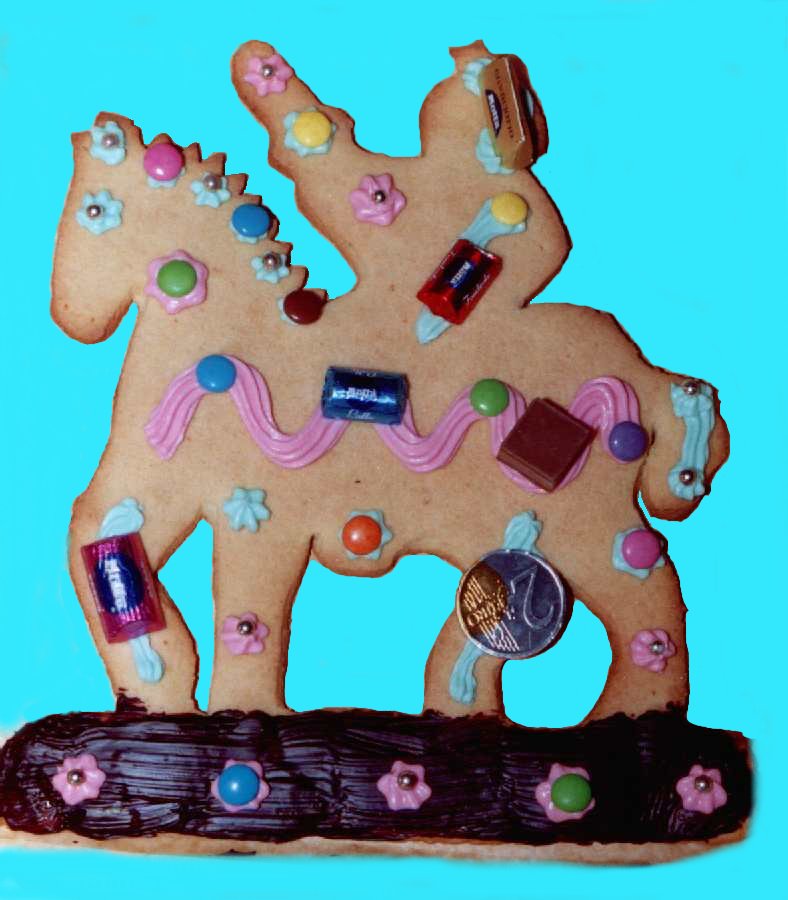